These washers are very cheap and are as widely available as fuses for plugs. You can probably get one from your nearest hardware-store or mini-DIY stockist, where you can buy them in small packets, or from a plumbing shop where they can usually be bought individually.
Washers for sink-taps are generally 1/2 inch, while bath tap washers are generally 3/4 inch.
If the dripping tap is in the kitchen, on the cold system, then the valve to turn off the water will be found under the sink.
If, on the other hand, it is from the hot-tap, then the chances are you will have to locate other stop-cocks (valves), usually located in the airing-cupboard / hot-water-cupboard / hot-press. See Picture 1.
 |
| Picture 1: typical modern hot-water cupboard (note the pump on the floor). |
Step 1: In this case, there is a pump-switch, as indicated. Switch it off.
 |
| Picture 2: turning off the water pump. |
Step 2: Locate the stop-valves, as indicated in Picture 3. (These values may be hidden behind clothing etc - follow the pipe-work to find them.)
 |
| Picture 3: Values in a modern hot-water cupboard |
Step 3: Turn all the stop-values off, by turning them clockwise.
Step 4: Put the plug into the sink, to avoid losing small pieces.
 |
| Picture 4: Kitchen sink with drainage plug in place |
Step 5: Use a small pen-knife or similar to gently prise the cap from the tap, as indicated. In this case, the hot tap.
 |
| Picture 5: Removing the cover from the tap top |
Step 6: Using a screwdriver, remove the screw.
 |
| Picture 6: Using a screwdriver to remove the screw which holds the tap-top in place |
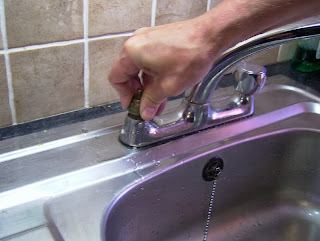
Step 7: Prise the top of the tap upwards. This may take some wiggling and persuasion, depending on the age of the tap. Be patient, do not use force.
The illustration shows the hot tap of a mixer-tap being replaced.
 |
| Picture 7: manually removing the top section of the tap |
 |
| Picture 8: a mixer tap, with the hot tap-top removed |
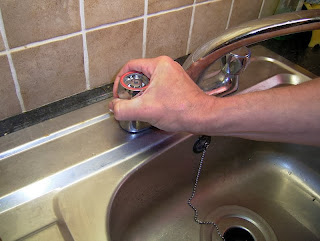
Step 8: Using a ring-spanner, turn the top of the tap anti-clockwise. (There may be a little water loss, as shown.) Remove the tap-insert.
If necessary, the entire tap-inert can be replaced. New tap-inserts are easily available from hardware shops - be sure to specify if you need an insert for a bath-tap or a sink tap:
 |
| Picture 9: using a ring-spanner to loosen a tap |
 |
| Picture 10: tap body removed |
Step 9: Using the pen-knife, prise off the old washer.
 |
| Picture 11: using a pocket-knife to remove a tap-washer |
Step 10: Press the new washer into place.
 |
| Picture 12: Pushing a replacement tap-washer into position |
Step 11: Replace the tap insert and tighten it clockwise by hand.
 |
| Picture 13: hand-tightening a tap inert |
Step 12: Using the ring-spanner, tighten the insert.
 |
| Picture 14: Using a ring-spanner to fully tighten a tap insert. |
Step 13: Replace the tap-top, and firmly press it back into position.
 |
| Picture 15: Placing a tap-top back in position over the tap-insert. |
Step 14: Replace the screw and tighten it - by hand and then also with a screwdriver.
 |
| Picture 16: Tightening a tap-top screw by hand |
Step 15: Press the cap into place
 |
| Picture 14: replacing the tap-cover |
Step 16: Remove the drainage plug from the sink.
Step 17: Go to the hot-press / airing cupboard, and turn all the valves anti-clockwise to turn the water back on again. Switch on the pump, if applicable. If the tap being repaired was the cold-water tap in the kitchen, then don't forget to turn the valve under the sink back on.
Step 18: Job Done! Test the tap to make sure that it is working properly and not dripping.

Thanks for that
ReplyDeleteThanks, very helpful. If the flow is now way less than before, what have I done wrong? Tightened too much?
ReplyDeleteThank goodness beautifully clear step by step guide just what I needed after researching for hours Thank you very helpful.
ReplyDeleteexcellent!! It went like clockwork and for a lady over 70 what an achievement! Thanks
ReplyDelete